Video: https://youtu.be/Wy7HDj2igPo
The purpose of this tutorial is to introduce readers to the potential for using Q learning in Unreal Engine. While geared to game engines, the intuition can be extended to other platforms and will hopefully inspire a variety of use cases. Q-learning is also the foundation for more advanced systems of intelligent behavior such as those found in the AI Emotions Toolkit.
All of the blueprints and instructions necessary to get this working in Unreal Engine can be downloaded here.
Q learning is one of many reinforcement learning techniques and has a number of advantages over similar algorithms – namely it is simple and robust.
While I will not provide an in depth overview of reinforcement learning or Q learning here, which can be obtained elsewhere, a very cursory introduction to Q learning follows.
Q learning can be broken up into a training phase and exploitation phase. During the training phase the agent randomly explores its environment while populating a Q table with value associations according to the rewards it receives. Later it uses these value associations to predict which actions led to rewards and which did not. This then becomes the basis for how the agent chooses to make decisions in the exploitation phase. Rewards can take negative values if one wishes the NPC to avoid something in the environment. Q learning supplies both a stick and a carrot to drive character behavior in a very naturalistic manner. It can be used to replace or supplement many of the utility based calculations that previously endowed an NPC or AI with dynamic lifelike behavior.
In this Q learning example, we make use of a Reward table and a Q table to drive learning in a synthetic agent or NPC(Non Player Character). The Reward table, as its name implies contains ALL the reward information the NPC can possibly encounter in their environment. The Q table on the other hand, contains only the reward information thus far discovered by the agent in their exploration of the environment. Essentially, the Q table is a storehouse of all the associations the agent has made which can be used to drive behavior. As the agent learns about its environment, it populates the Q table with reward information such that it can learn to predict which actions lead to rewards and which do not.
The Q learning equation is given below, where state and action pairs refer to coordinates within the Q table and Rewards table respectively and gamma is a fixed discount rate between 0 and 1 which controls how much the agent values present rewards vs. future ones.
Q(state, action) = R(state, action) + Gamma * Max[Q(next state, all actions)]
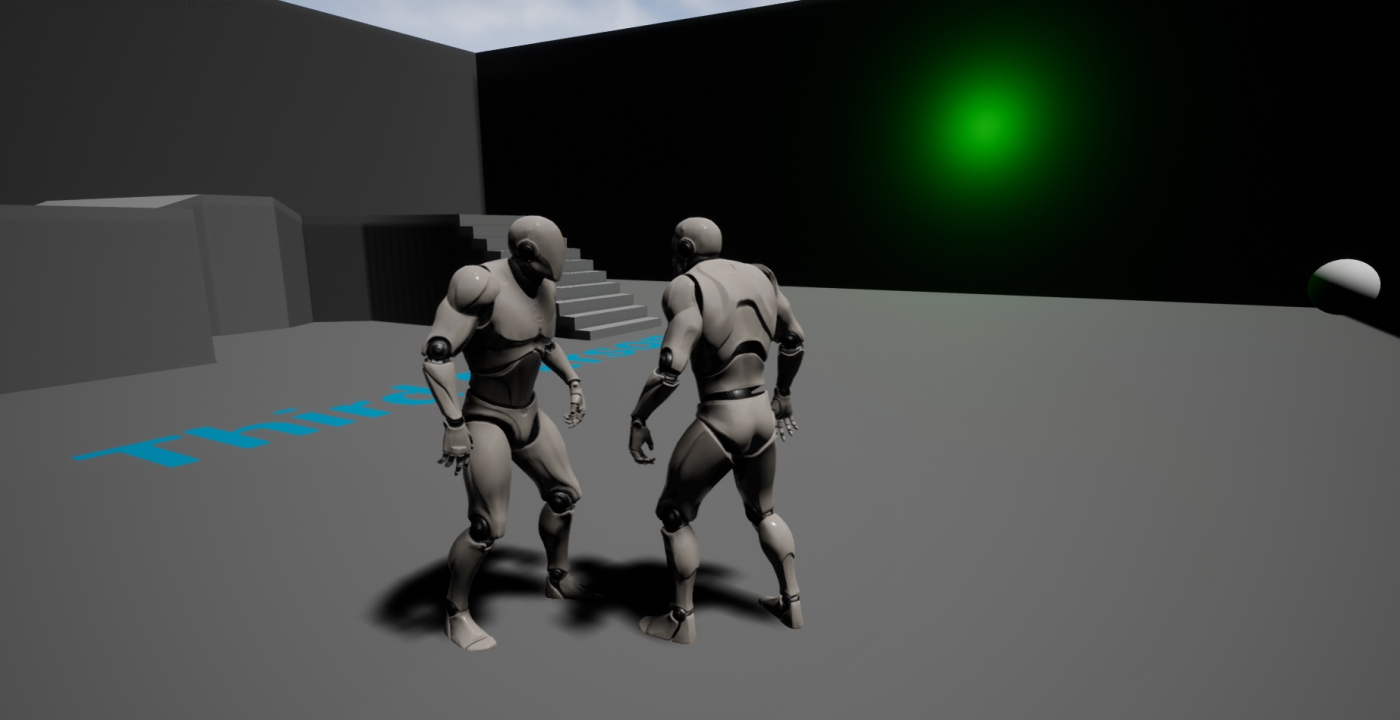
In this tutorial we use Q learning to solve a match to sample puzzle in which the NPC learns that it must activate a switch within the game environment at the same time that a light is on in order to receive a “food reward” at another location. Similar puzzles have been used in a wide variety of animal learning experiments that explore instrumental and associative learning abilities. The key point being that the agent must learn to predict that it can take an action to receive a reward only during specific circumstance, in this case, when a light is on and it first touches a switch and then proceeds to a food bowl. The same action taken when the light is off will not generate the reward.
The setup for our task is that NPC begins with a training phase in which it randomly travels from one of four locations, 3 food bowls and one switch, represented by balls and a cone respectively. During training period, it learns associations about the values of each of these elements, how they are affected by the light that periodically turns on and off, and its own actions.
If successful, after training the agent should display intentional behavior by first going to the switch(cone) and then going to the food reward bowl but ONLY when the light is on in order to recieve food rewards. This method can be used to provide a wide variety of intentional behaviors, including avoiding enemy players, collecting health points, and almost every behavior a human player is capable of manifesting within a game environment. In a modified version of this example, the agent learns to approach the player for “food rewards” in the same way a dog or cat might learn to approach a human master for a treat.
I assume a basic familiarity with the Unreal Engine game blueprint environment, which if lacking, can be obtained from the very excellent tutorial series on the subject available on YouTube.
A Word about Variables
The Unreal Engine 4 Blueprint environment does not natively support 2 dimensional arrays – the workhorse of any Q learning algorithm. The workaround used in this tutorial is creating a custom struct array whose elements themselves are arrays.
The following thread has additional information for working with 2 dimensional arrays in Unreal Engine
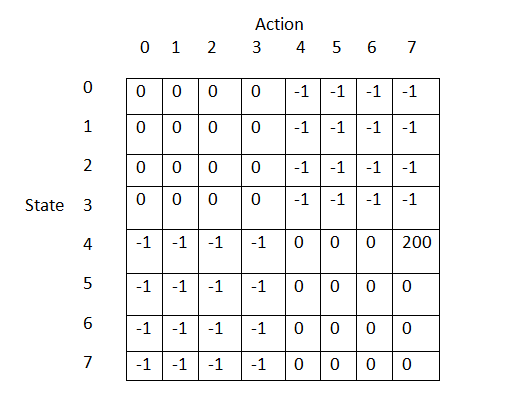
In this example we require an 8 by 8 array for both the Rewards table and Q table. The first value in each table refers to one of 8 possible states the agent can be in, given by the 3 spheres and the 1 cone. Each of these 4 states can exists with lights on or off, so numerically this equates to 8 unique states. The second value refers to the action the agent takes from that state, in other words, the location the NPC traveled to next.
So if the agent was at a state 4 (the Cone) and subsequently traveled to state 7 (the food bowl), it would refer to the state-action-pair given by R(4,7) and Q(4,7) for the reward and Q tables respectively. Bear in mind that Q table will be updated during the match to sample task, while the Reward table remains unchanged and is initialized as shown below. The Q table is initialized with all 0 values.
Values for Rewards Table
Step 1
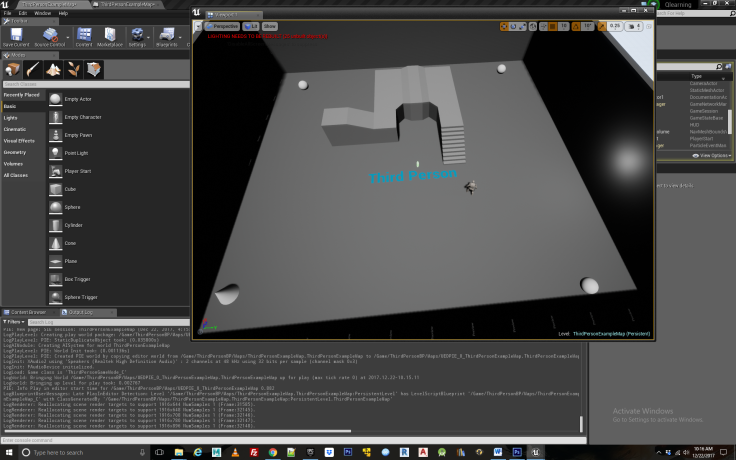
We begin in the third person template provided in the unreal engine example files. From here, create 3 spheres and place them at the corners of the room, as well as a cone that will function as the “switch” for the agent to press in activating the food reward, and a point light directed towards one of the walls. Next create a nav mesh bounds volume that will cover the entire floor space of the scene, which will allow your NPC to move around the environment. See Figure 1.
Figure 1
Step 2
Now we introduce a new folder, named AI, that will control our reinforcement learning NPC. Inside we add 5 custom entities:
- 1 Custom Structure – 2 dimensional array
- 1 AI Behavior Tree
- 1 AI Blackboard
- 1 AI Character Controller
- 1 AI Character Blueprint
All these assets are available for download from Unreal Marketplace
Having added the default third person character component to our level and the AI folder, renaming it AI character BP, we now must make some modifications to it so our character can access the locations of the objects we added to the level- that is the spheres and cone. To do so we must create blueprint variables for them within the AI Character BP. Inside AI Character BP Blueprint we have added 4 actor variables and named them target(0-3). In addition we have added a point light variable and static-mesh actor variable, the latter of which is used to change the skin of the feed bowl when the light is ON, displaying that it is now activated. Having added these variables, we must now assign them targets within our level blueprint by clicking the AI character component and assigning each variable to its respective object within the level. Now they are linked up so they can be caste to from within the AI Character controller BP.
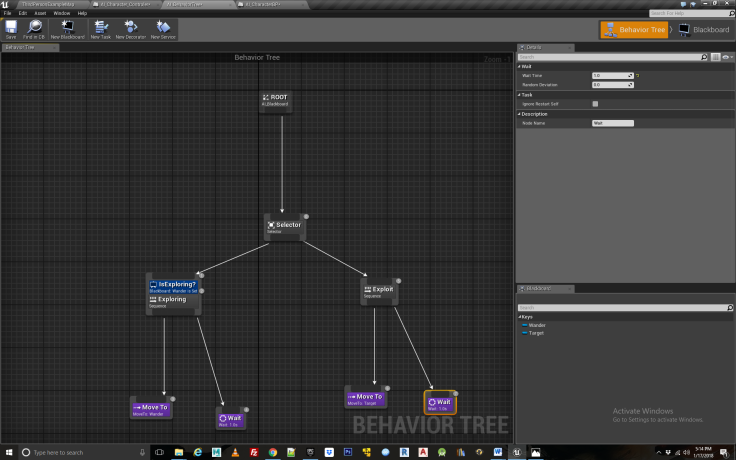
Next we introduce an AI_Blackboard and AI_Behavior Tree. These will control the actual movements of the NPC as it learns different behaviors. The AI Behavior tree is made according to Figure 2.
Figure 2
The AI Blackboard contains two variables- wander and target, which refer to the destinations for the NPC to travel to when it is in exploration and exploitation phase respectively. These destinations get updated according to the “brain” of the NPC which is located within the AI Character Controller BP.
Proceeding to the Character Controller BP, we begin to add functionality to our AI. First we must create some logic to control the light switch activates the food bowl. For convenience and modularity this has been located within the AI character controller BP, though you may wish to put it in the level blueprint. At the launch of the experiment, identified by the event begin play, we initiate the light changing through a sequence node. See Figure 3 and 4. This randomly starts with the light on or off and will continue to function automatically in the background as the agent learns to predict the actions needed to receive a reward. In this light changing blueprint we have also picked target number 4 to function as the food bowl and change its color when the light is on or off to indicate it is activated. This is not strictly necessary but was useful when debugging and provided a little more pizzazz to the scene so that the user can see when the food bowl is activated. You can choose any of the spheres to function as your food bowl but will need to be consistent going forward.
Figure 3
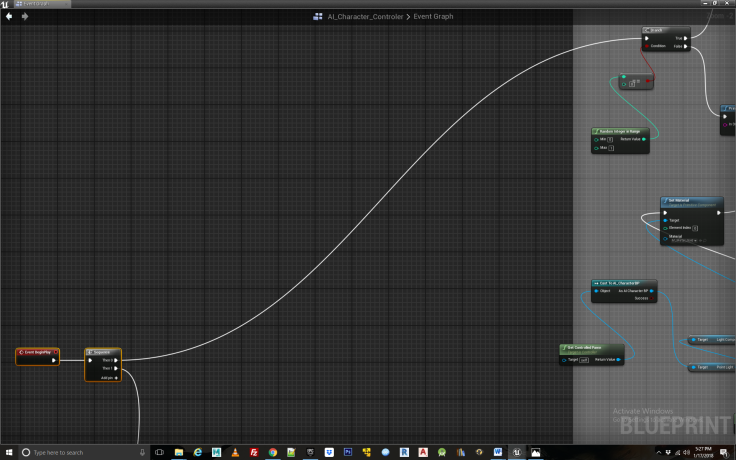
Figure 4
Step 3
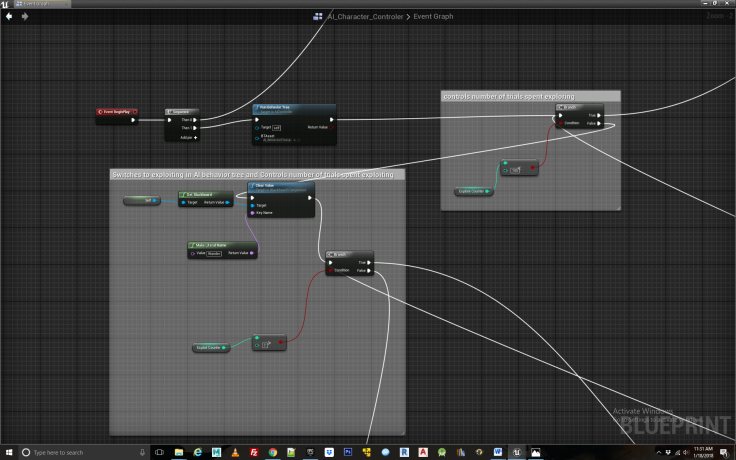
Next we draw off from the second element in the sequence node and create some logic that will determine the trade off between exploration and exploitation of our character. For those unfamiliar with the exploitation/exploration trade off, this refers to how much time the agent spends exploring new behavior, i.e. making random choices vs. the amount of time it spends exploiting knowledge gained during exploration to achieve some reward. In this case we have broken these up such that the first 100 iterations of the experiment it spends exploring and the last 7, it spends exploiting, or in this case “feeding”. We transitioning to exploitation, we clear the Wander key which tells the AI blackboard to move from exploring to exploiting. See Figure 5.
Figure 5
Step 4
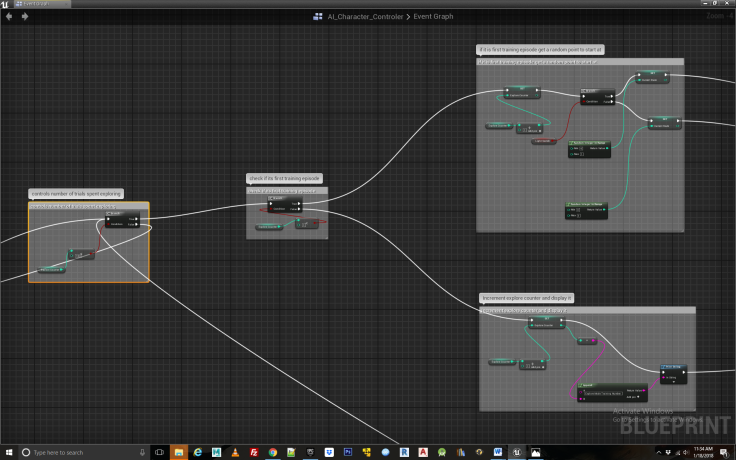
From here we create the core logic for exploring the environment, beginning with a counter that keeps track of how many iterations the agent has spent exploring and also picks a random location for it to start each iteration at, which in this case corresponds to the four different items in the environment, the three spheres and the one cone which is used as the switch that is necessary to visit before the agent can receive food from one of the dishes. If we wanted to ensure convergence, e.g. that the agent always learns the correct sequence of events to obtain the reward after training, we would have the agent start at all the four locations repeatedly instead of picking a random starting point. I prefer the random start points as it introduces another element of chance resulting in more natural behavior. See Figure 6.
Figure 6
Step 5
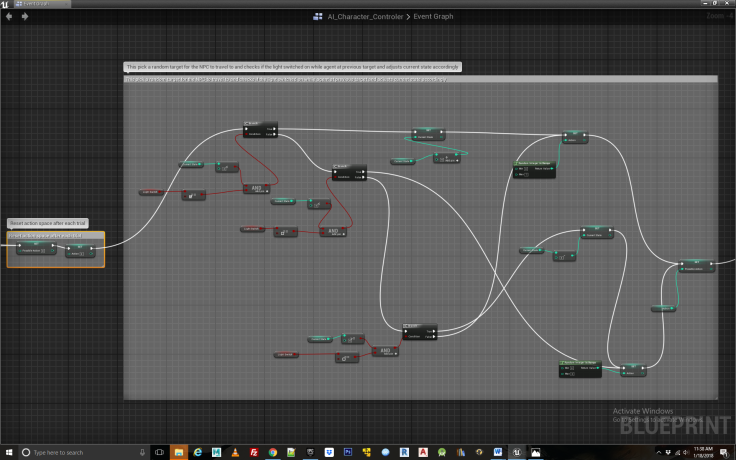
Now we need some logic to have the agent choose a random action in each iteration, as this is the entire basis of exploration. The intuition behind such exploration is to assign a number from 0 to 3 for each of the locations the agent can travel to in search of food, including the switch it will use to activate the food reward. But because there is a light that turns off and on, our state space must account for the fact that each location can exist both with the light on and the light off. Therefore, instead of there being 4 different locations within the rewards table and Q table, to represent them each uniquely there must be 8 different locations. We have used numerals 0-3 to represent the locations with the lights off, and 4-7 to represent the same locations with the lights on. So for the Q table to represent all the possible state action pairs the agent can take is 8 by 8, indicating all possible state action pairs. But since if the lights are off, it cannot travel to a state in which the light is on (no time travel allowed!) we use -1 in the Reward table to signify actions that cannot be taken. We also need some code to account for if the light changes while the agent is in particular state. See Figure 7.
Figure 7
Step 6
Next we have some logic to enable visualizing the agent traveling from state to state during this training period. Because this can be quiet tedious to watch, we add a delay node which can be set to 0 in order to disable the lengthy process of having the agent explore its environment. Even when disabled, it will still populate the Q table with training data, but much faster than if it actually visually travels from state to state. Note, disabling visualization by setting the delay to 0 will only result in learning if the blueprint controlling the light defaults to the on position because otherwise the entire sequence of training takes place when the light is off and the agent never gets the rewards that drive learning. For the full experiment, the visualization must remain on so that the agent can learn from changes in the light. Depending on how fast you have set the max walk speed for the AI, a delay of 5 seconds will be sufficient for the agent to reach its destination before starting the next iteration. We have set max walk speed to 1000. See Figure 8.
Figure 8
Step 7
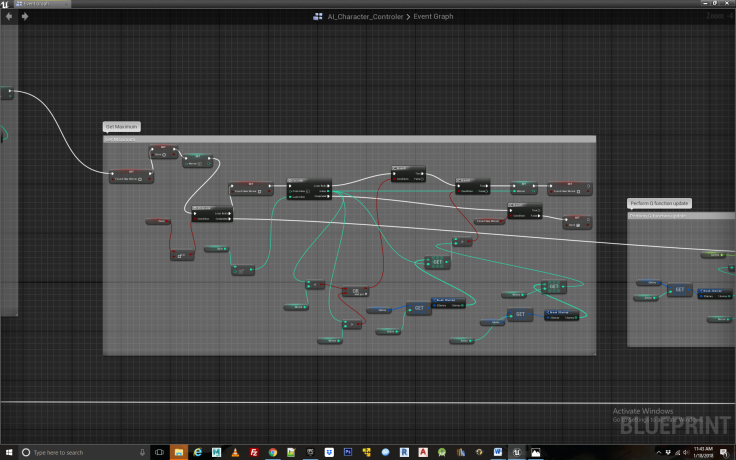
Once the agent has chosen a random valid action, we proceed with the Q learning update equation. To do so we need to use a bit of a work around particular to Unreal Engine which doesn’t support updating multi-dimensional arrays. Instead, we create a temporary one dimensional array, copy existing values to it from the Q table, and update these values before copying them back to the Q table. Rather laborious, and screaming for a fix from the UE dev team. After creating the temporary array we need to perform one of the actions essential to Q learning, what is known as a bellman update represented by the Max[Q(next state, all actions)] part the equation. In this the agent looks ahead one step to see what is the best action it could take following the current state action pair it is evaluating. This one step look ahead is a key component of Q learning as the whole principle of reinforcement works by backward induction; that is a reward is propagated backwards across the states and action pairs that were taken immediately prior to receiving it. The code for determining Max[Q(next state, all actions)] is seen in Figure 9. In effect, we loop through the Q table to find the highest subsequent action the agent can take and store this in a variable which gets fed into the Q learning equation.
Once Max[Q(next state, all actions)] has been determined we proceed to the remainder of the terms in the Q learning equation, namely multiplying Max[Q(next state, all actions)] by gamma(the discount factor) and adding that to any reward obtained from undertaking the present action, that is R(state, action). The blueprint logic for doing so can be seen in Figure 9.
Figure 9
Step 8
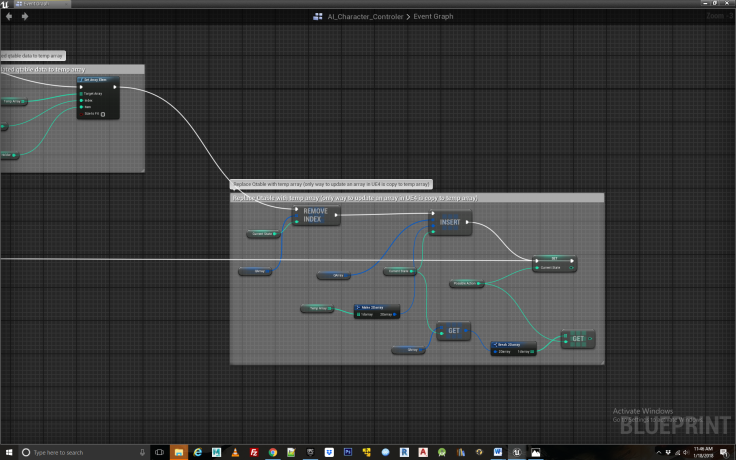
Now that we have all the values for feeding into the Q equation, we insert them, perform the calculation and update our Q table with the results via the temporary array. In addition we must set our current state to the action from the proceeding state, thus moving our agent along its path. Than we rinse and repeat, doing the whole process again. It’s only by repeating the exploration process via iteration that the agent eventually learns the correct associations for solving the match to sample task. In this case, we have set the value of R(4,7) in the Rewards table to a value of 250. The remainder of the Rewards table is filled with 0 or -1. R(4,7) indicates that being in state 4, which represent the cone shaped switch when the light is on, and then proceeding to location 7 which is the third food bowl, the agent receives a reward of 250. This in fact specifies the solution to the match to sample task and that is why we must set a reward for it. The final bit of housekeeping in which we loop back to the beginning of the exploration logic can be seen in Figure 10 and 11.
Figure 10

Figure 11
Step 9
The last portion of our blueprint code is the exploitation phase of the experiment, in which the agent demonstrates any behaviors it has acquired through training. The intuition for this is fairly simple. Instead of performing the Q updates, it simply accesses the values built up in the Q table to determine which is the best action to perform in any given location in which it finds itself. In other words, what location it should travel to next given the state it is now in. Table locations with higher values equal better actions. The Q table updates are no long present and now the agent begins acting “intelligently” by drawing upon past associations.
Step 10
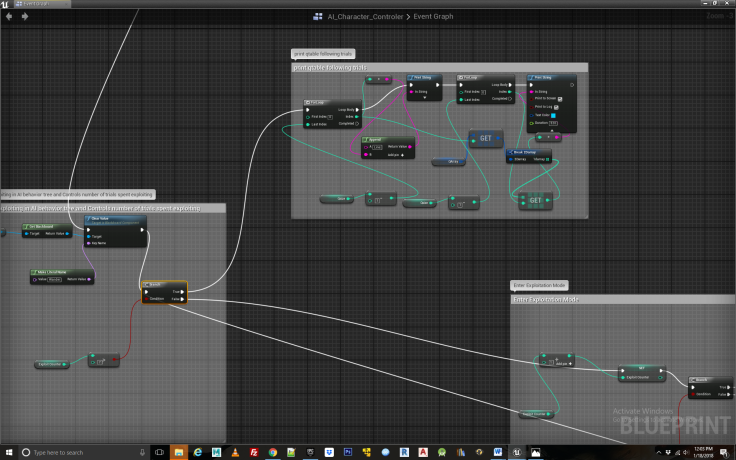
We begin the exploitation logic much like the beginning of the exploration loop, by adjusting the variable in which the current location of the agent is stored to account for whether the light has changed while they were in transit. See Figure 12. Next we choose the best action for the agent to perform by simply looping over the Q table to find the action with the highest value. Refer to Figure 13. Once the best action is located we update our action variable to reflect the new winner as well as check if this has resulted in the agent getting a food reward, in which case we provide an alert in the form some printed output. See Figure 14. After this, only one thing remains to be done, that is, visually travel to the new state indicated by the winning action. When this is completed we simply loop back to the beginning of the exploration/exploitation code and begin another round of exploitation if the counter has yet to complete. See Figure 15. This continues for however many times you set the exploitation loop for. Finally when both the exploration and exploitation loops are complete, we can print out the contents of the Q table so one can check that we are getting sensible results and the agent is indeed behaving appropriately. See Figure 16
Figure 12
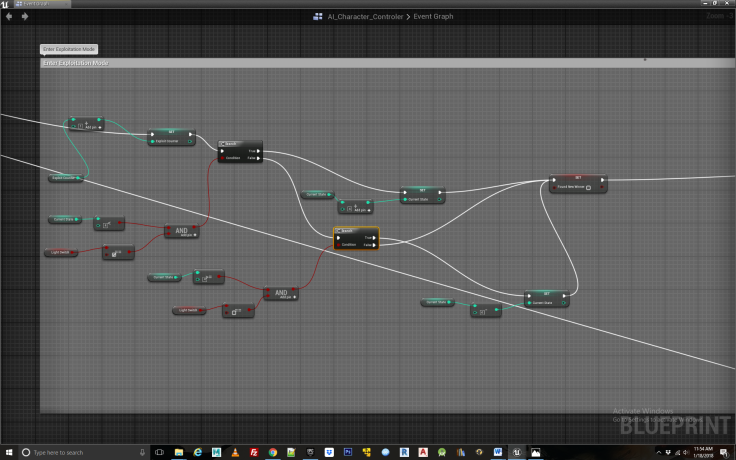
Figure 13
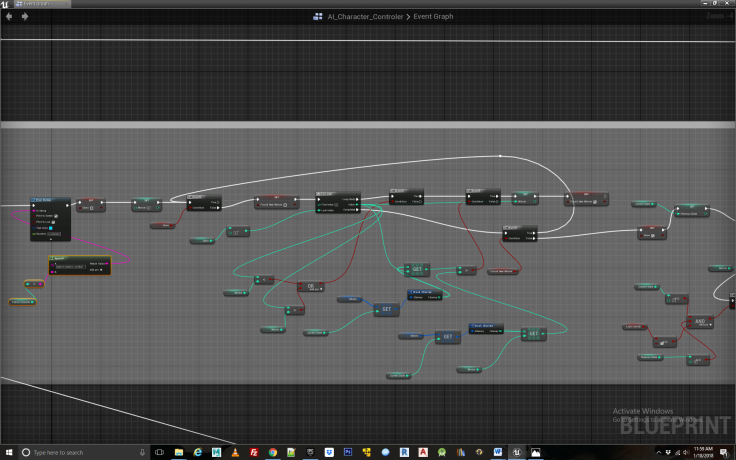
Figure 14
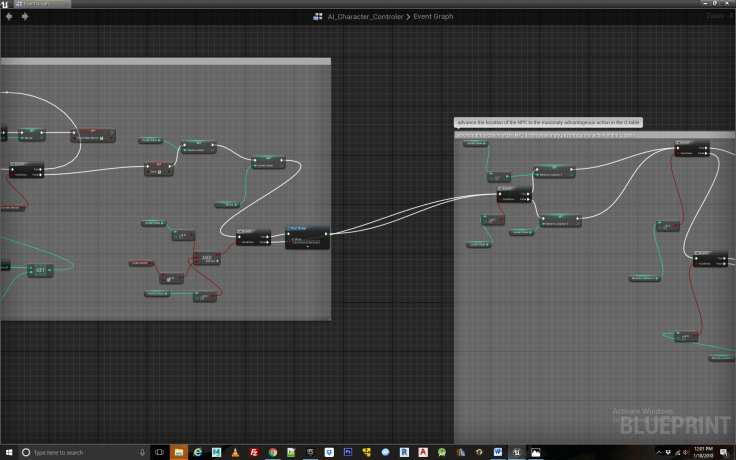
Figure 15
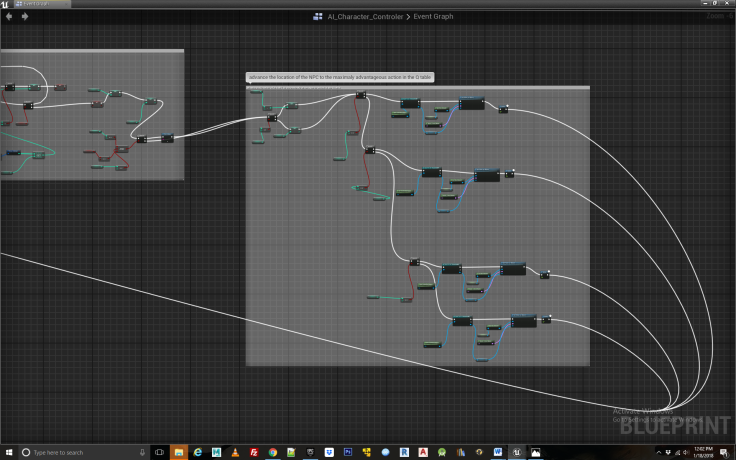
Figure 16
Congratulations, hopefully you now have a fully functioning reinforcement learning NPC akin to the one in this video.
To reward other actions taken by the NPC, you have only to assign them a state action pair within the reward table, decide how much value the reward is worth and connect the state action pair to some event within the game.
Will do my best to respond to questions left in the comments sections.
